


Last week I tried my hand at my first graphic transfer onto a pillow. It was too fun and with all the graphic images available thanks to blogger friends like Karen at http://graphicsfairy.blogspot.com/ and Elizabeth at http://thelastdoordownthehall.blogspot.com the options are endless!
The one below is from a digitized graphic Elizabeth posted this last weekend. (Elizabeth is the one that recently sent me the extrodinary box of goodies!)
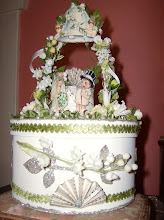
When I saw this image, I absolutely loved it and couldn't wait to see if it would work on a transfer because it is SO detailed! No burlap on this one. It's natural toned muslin with cotton lace and black velveteen ribbon. (The back side, shown right, is black velveteen overlayed in a cotton crochet fabric.


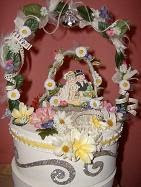
Then, this morning, I made one with a French illustration from Karen (GraphicFairy link above.) Okay, cute Frenchy girl, pretty little bird and blossom and then you throw in Chocolate????
What's not to love about this graphic?
The photo background of the tranfer appears pinker than it actually is, I kept trying to adjust the color,,,but here it is. (Go figure, it was sunny in my office, a rare occurence in Washington!)

This is a larger square pillow, about 15" square. Again, I used crochet lace trim, which I just love and this one was applied to burlap.
The back is burlap also. I used some wide industrial cotton twill tape to reinforce the closure on the backside and an assortment of vintage buttons from my grandmothers old button stash!

Tonight, I'll be stiching some snap closures under the buttons to finish it off, good project while watching TV.
And I thought I'd post my first attempt I made last week for our "Junky Swap Party." And then tell you a bit about what I've learned from the whole process, in case you want to try some!

The first attempt had a few scortch marks on it, but I thought it made it look a bit more vintage. I absolutely loved this image from Karen, and I may use it again,,,,,,,and it's twin! (Similar image in the same colors of a little French girl frolicking through the flowers and birds, too cute!)
Okay, so here is what I learned:
My iron runs HOT!!! The first transfer I used of the image immediately above, was scorched to smithereens!
I left it that hot on my second attempt-the image you see above,,,,,but moved the iron a lot faster. As stated/shown a bit scorched, but better.
I had done this because the first two transfers I used were samples that I had on hand from my HP kit when I bought my printer,,,,,,THEY said, heat your iron on MAX for 8 minutes before using. Well, besides blowing the breaker, it did scortch a bit.
So on Friday when I went to Office Max, they only had generic brand transfers,,,,,,theirs of course! And the instructions on theirs said to put the iron on "Cotton" setting. And I did. And, the images transfered better and low and behold I didn't even trip the breaker in the craft studio!!
As illustrated, my transfers were all done onto cotton muslin. Which takes the higher heat AND has a smooth surface for fine detail like these images. IF you are going to transfer on Burlap, I'd make sure you have a less complex image. AND make sure whatever you use is wrinkle free!
Okay,,,,,,coming "clean" here:
Make sure you reverse your image. It SAYS so on the transfer instructions, but on my first printing onto a transfer, this right brained gal thought,,,,,,"oh well, I don't mind if the image is facing the other way",,,,,,,,but of course the wording was TOO! Duh! I'd even read this, but STILL did it!!!
And,,,,,make SURE you put the transfer sheet in the copier "right side down." There is an image/grid on the wrong side,,,,and that is what you SHOULD see when you load it into the printer.
(I know, I know, again, probably me and that whole "lysdexic" right brain thingy!)
You may also want to start with some smaller images. You can even do a whole 8 1/2" x 11 sheet through your "print photos" program -just like you would do multiple photos. So, you get ONE full sheet, two 5x7's, 4x6's ,,,,,etc, etc. I did another fun graphic today on a transfer sheet full of multiples that I'm going to use for bags of lavendar, once in BLOOMS in Washington!
Okay,,,,,,there are other tutorials on this stuff on the Web and in Blogland, and you can go check out Karen's Brag Monday posts to see other info, but feel free to contact me if you want to try it and have any questions!
Go forth and Create!!
Hugs,
Shell


Amazing! Your pillows look just fabulous. :-)
ReplyDeleteHave a wonderful Tuesday!
Anne
They are beautiful and I'll just bet the scortching makes it even MORE vintagey (is that even a word?)
ReplyDeleteWell Shelly, you are an expert now!!! They are all gorgeous! I'm so glad you linked these beauties up today!!
ReplyDeleteThe pillows are gorgeous! Don't you love all the wonderful graphics available? I have tried transferring several times and my images come out very light. I may try to have the image printed at a copy shop. Thanks for your visit and sweet comment on my yard sale finds.
ReplyDeleteCrap...I just typed my comment and then lost it! Bleh!!!
ReplyDeleteI have always wanted to learn how to do this! Your pillows look wonderful!
PIECES!!
LuLu♥
Love your pillows, Shell! You've used one of my favorite images ~ the French girl chocolate ad. I've used that in a couple of projects myself!
ReplyDelete